A raised pond is a feature that can realy elevate (pun intended) your garden to the next level. Far safer than a traditional ground pond, a raised pond frame is easy to construct by yourself. In this article, we’ll be looking to teach you exactly how to do just that.
How to build a raised pond with wood? An effective pond liner is essential to your wooden pond, but a variety of woods are available for your next pond building project. You can build a pond with decking, a pond with railway sleepers, and whichever you choose you’ll be able to find the method below.
So before you start pond construction, keep reading. This is an easy project to do at home, but missing any step can be a disastorous mistake best avoided by amateur DIY enthusiasts. Garden ponds take patience, whether this is a decking pond or regular ground level fish ponds.
Why Build a Raised Pond?
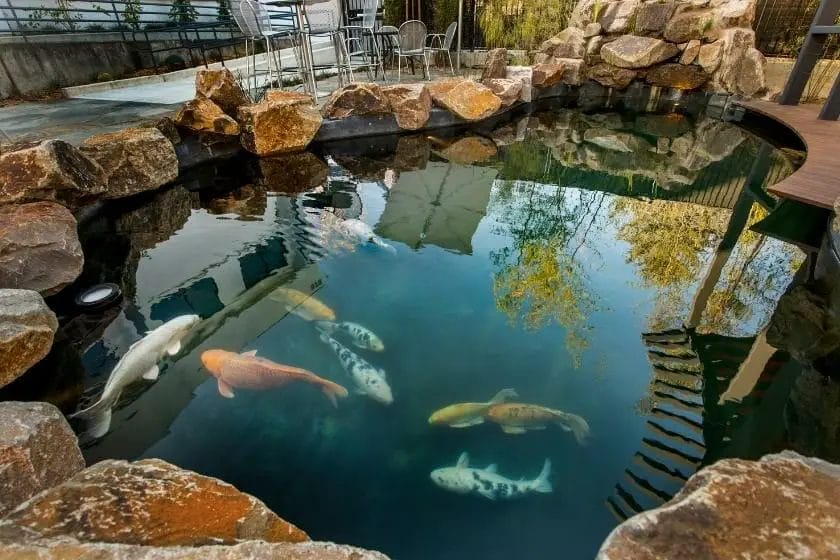
Raised ponds come with many benefits that a regular pond may not meet. The primary benefit of all these will be safety. If you enjoy a household with small children or pets, then an elevated pond platform can help you avoid unwanted accidents. Falling into a pond can be dangerous business, so creating some pond walls will help prevent nasty accidents.
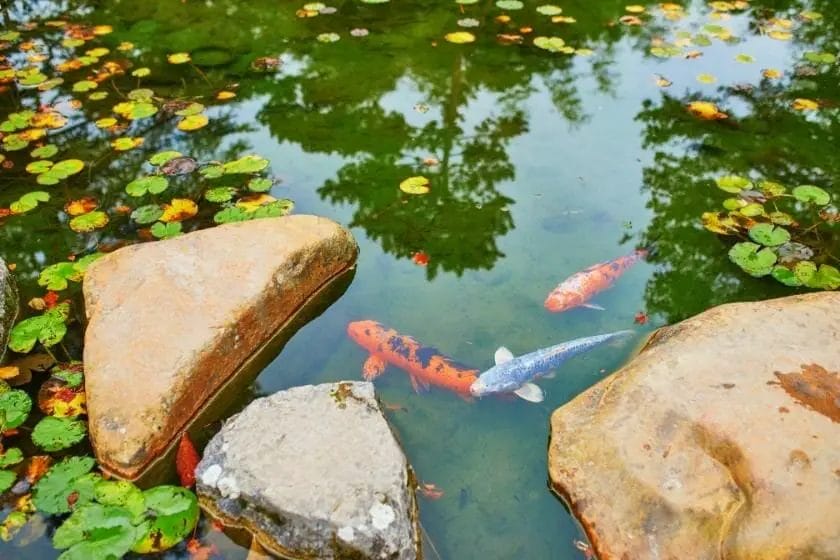
Not only will this protect those outside the pond falling in, but it can protect anything you’re keeping in the pond from being disrupted as well. As a result, raised platforms are the ideal way to keep a koi pond, where the fish are unlikely to be disturbed but still just as beautiful and easy to manage.
Suggested Equipment and Safety
A timber pond will require different tools and equipment for construction. Luckily for you, these tools are quite basic and are often kept by any home owner. This means you’re unlikely to have to shop for new and overly specific tools that clog up your tool box, but you will have to purchase the wood involved.
For this project, we recommend:
- A saw, for sizing your lumber
- A Measuring tape, for much the same purpose
- Pond liner, to prevent water spillage
- A drill, to fasten your planks together
- Screws, to drill into your wood planks
- Fasteners, to keep the liner in place
- Wooden decking or railway sleepers, to build the actual platform
- A pencil, to mark off your measurements
- A set square and/or ruler, to take your measurements
- Pond underlayment, to prevent punctures and holes in your liner from sharp objects
You may also be inclined to purchase additional equipment or use other things to help this project come along. A workbench and dedicated work space can help you remain organised when building a raised pond, regardless of whether you’re using a hand saw or an electric saw.
Decking lights, underwater lights, or other forms of pond decoration are also welcome. An elevated koi pond or similar is a very beautiful feature for your garden, so sprucing it up further can turn a wooden block pond into the centre piece of any outdoor area.
Water filters also help keep your pond clean, cutting down on future cleaning times. You can find a range of combination filters commercially available, but the fitting of filter systems is important to pond health. There are also different types of compact filters for optimising the space you use.
Pressurised filters and black box filters can be placed outside the pond, beside or even further away. Gravity fed filters or a bio filter typically have to be set into the pond water, and are managed with a filter controller module that will also therefore be submerged. If keeping fish, a solids handling filter pump can also prevent blockages from animal waste.
Pond returns are just as important as combination filters – drum filter, or pressurised filters. Pond returns promote circulation in the water vital to a clean and healthy pond environment, and even the most creative pond builder needs to keep the water suitable for viewing or fish. They do this by managing the water supply to pond at an angle, encouraging circulation.
Railway Sleeper Method
Railway sleepers are typically wider pieces of wood, and can be perfect for building an easy raised pond. There are actually several construction methods, which we will now look into:
- Step One) Choosing the ideal location. We’ll discuss ideal location later on in this guide, but it should be noted that an even surface is suggested. For formal ponds, designed with aesthetic as the first priority, this is especially important. A formal stock pond should not show excess post material or extra polyester underlay material above the pond surface, which is difficult to achieve with an uneven level.
- Step Two) Placing your first layer of sleepers. In a square or rectangular shape, place the wood at right angles perpendicular to one another. For speed, this is best done by having the wider edge of the wood facing outwards, laying them on their narrower side. If you’re not using the narrow edge option, then continue adding layer to layer until the final layer of railway sleepers is the correct height. Do this until the frame achieves a rectangle or square shape.
- Step Three) Attach and fasten. With your pond framing in place, you now have to fit them together. Your pond frame will likely take screws, although if you’re building with wider edge layers then you may need additional screws or longer variations. If you are using corner posts or frame posts, then fasten to these. However, corner posts are more necessary for decking ponds than sleeper ponds.
- Step Four) Begin the second layer. This is only for the narrower option of your sleepers, as the wider option can be done more easily all at once. Garden ponds take some raising to reach a suitable level, so only repeat the initial steps and continue adding layers until you deem the pond floor to be a sufficient size. You don’t want to end up with a finished pond and have it be too low or too high as a result of omitting or including an additional thrird layer.
- Step Five) Attaching your pond liner. Underlaying can be used to cover any sharp edges or the base of tree roots, things which may cut or puncture your liner, to prepare the pond for pond liner. In a worst case scenario, any thick material such as a carpet can be used as an underlay. The liner will be attached by the aforementioned pond fasteners, fitting to your shaped pond with relative ease. Consider what pond liner size is appropriate, as excess material can be an eyesore.
- Step Six) Fill the pond with water. This step is perhaps the most self-explanatory of them all. Let the water flow and fill the space, and monitor your liner for any loose areas. If the liner is too loose, then consider adding some timber capping to keep it in place and obscure it from vision. If you’re looking to make an elevated gallon stock pond, then add fish once the water has filled the pond area, and consider adding a soft sand base or some sediment to the pond floor.
Decking Method
A decking pond uses only a slightly different type of wood from the sleepers, but it is this method that will get you results. There are slight variations on the railway sleeper pond, so if you’re using wooden decking then use the following method:
- Step One) Location. You still must choose the ideal location, finding level ground. If you can’t access an even surface or concrete, then try using a layer of brick as a foundational support for your future pond. Choice of decking is also important, and up to you. Feather edge planks tend to be the cheaper option available at most hardware stores, but flanged edge decking is the sturdier and more reliable long term option used by most patio construction services.
- Step Two) The frame. Unlike the sleeper pond, your decking pond will require corner posts. Inch posts of a uniform length are highly recommended, as height disparity in your corners can lead to issues further down the instuctions. Use a tape measure to correctly calculate the length you desire. Next, on the composite decking panel, mark the spot previously calculated with a pencil. You can now cut those planks to fit the span of the pond with a handsaw. To construct the frame, drill a hole in each composite decking board with a power or manual drill. Then, to construct a frame, match up the very first four composite deck planks and screw them together. Once that’s completed, repeat the process to make the desire shape.
- Step Three) Attaching the decks. Much like the sleepers, attaching the decking is usually done using a drill and screws. Depending on deck size, you may need longer screws or additional screws to get the job done. Quick setting concrete can also fill the gaps between layers of decking, but for the frames on the corners it is better to use screws or nails.
- Step Four) The liner. Your pond floor with still need lining before it can be fitted with water, and you will want to underlay it to prevent holes or cuts. Once the pond floor is sufficiently covered, then use a capping layer to hide the line and prevent it from coming loose when filling with water.
- Step Five) Further capping. In addition to the capping layers, capping lids can be used to plug any worrisome holes you may have concerns about near the corner. Some of these caps can be submerged and even be placed up to their lids in soil, so you need not worry about fitting them in.
- Step Six) Enjoy! Your new pond should be ready to go. Make sure to fit any further necessary equipment, such as a four inch filter feed pipe for your filter pump or your pond return, to keep your water clean and healthy. Maintaining your pond with this equipment will save you the hassle of extensive regular cleaning manually in the future, so it’s always a wise investment to make.
What is the Ideal Pond Location?
The ideal height of your new pond is perhaps the most difficult choice to make, as it entirely depends on you and how you intend the pond to be used. Building straight on the soil level can be fine, or a dug out hole can make the pond larger than it appears on the outside. A level base is also suggested, to prevent any excess underlay being shown.
If standing then the approximate height we suggest would be anywhere between 90cm and a metre. However, a rectangular pond in your garden is more than likely going to be a feature for sitting and easy viewing. As such, 60cm to 75cm would be the best height from soil level.
If you haven’t got an easily accessible level surface, then consider a concrete base. Although more advanced than the rest of the construction, post mix quick setting concrete is widely available in hardware stores. This post mix rapid set concrete will take no more than ten minutes to harden, allowing you to even a surface in no time at all.
Another option of a hilly ground would be editting the height of your wooden posts. Having some wooden fence posts to be extra long while the rest of your vertical post remains the same can even the disparity in elevation found in your garden. Corner posts can also be easily buried into the ground slightly, if your measurements are a bit off. A spirit level can help verify this when needed.

Digging out a hole can also sort out your elevation issues, or any other manual levelling of the surface. Although challenging physically, if you are fit to do it then it is assuredly an important part of the pond building process. Uneven ground can lead to an ugly pond, showing off loose capping or extra liner that no one wants to see.

