Although it is easy to forget, modern electric power tools are a relatively recent invention on the scale of human history. We went for century after century without them, and were still able to produce shelters, furnitures, and doors.
How to cut door hinges without a router? A router or hinge jig is best suited to this work, but you can cut door hinges by hand with a hammer and chisel. If you would prefer to rely on power tools still, then consider using a drill or a dremel multi tool to help sort your doorway hinges.
A drill for hinge cutting, a sharp utility knife, and a chisel instrument can go a long way when it comes to working wood. They can help you clean away rough edges and fix hinges with screws, making your job far easier. Although a router with an appropriate router bit is preferable, it is far from necessary.
There are several different methods available, and the whole series of them can be quite different thanks to the nature of the tools we’ll be using. So let’s get right into it, and look at how EXACTLY we can cut our door hinges when we lack a wood router, and must use a different hinge cutting tool.
What is a Router?
Routers utilise a wooden or metal-bodiedmetal material plane to position wood before cutting it with an extendable blade or rotating bit. Suitable for narrow and accurate cut holes, arrow straight slots with a smooth finish, or any other slot border. Although hand routers are available, the power tool router table is now the most prevalent form.
Routers provide a great deal of control. From this control, they have been used in work that requires exact edges in construction methods such as mitered corners and/or dovetails, for beautiful carpentry work. Providing for more precise details in the creation and design of furniture.
A range of bits and cutters are obtainable depending on the type of hinge you desire. Not only can you make flawless hinge notches, but you can also give your wood a moulded edge, rounded edge, or even a beaded edge. Despite the fact that this is the most frequent tool for cutting off door hinges, it is not normally included in a standard tool kit.
We’ll investigate into router options later, but nothing beats the precision edges that a routing table’s wood blade can provide. The variety of slots that may be created is unrivalled, and no matter what sort of hinges you want, the end result will still be a clean completed size hinge cut that meets your goals. Of sure, as long as you follow our requirements. As a result, you should employ a routing table wherever possible.
Equipment you may Need
In place of a router, you can use multiple different tools. As previously mentioned, these can include hand tools and power tools depending on what you have access to, and what your needs require. So, let’s take a proper look at what you will be using:
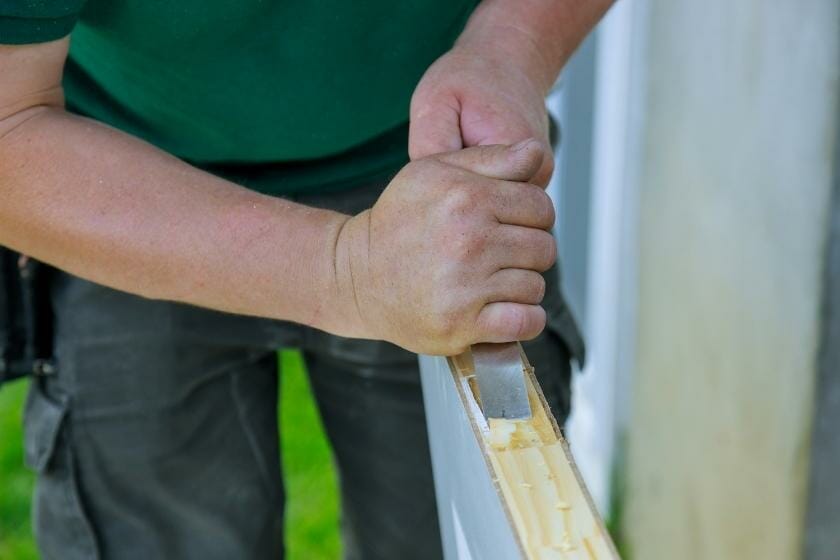
- A chisel, a non-electric method of cutting into wood. Perfect for clearing uneven edges, a 1.25 inch chisel can get your hinge jobs done
- A hammer, you’ll struggle to chisel without one. The added force of a hammer can be as good as a door’s strike plate, forcing the chisel to clear off wood and cut out the door hinges
- An electric power drill, perfect for cutting through any piece of wood. Much like a chisel, a drill can easily dispose of excess wood. However, this will be a better option for more difficult and durable woods that chisel poorly, such as hardwood doors
- A Dremel multi tool, a rotary tool perfect for shaving a piece of wood. This will produce more wood dust than the other methods, but much like the drill it is ideal for heavy doors despite the wood shavings. A Dremel works similar to a wood router, with a spinning bit that can be fitted for your needs, from heavier doors to cabinet doors
- A tape measure, necessary for any construction project. You don’t want to be drilling random screws or cutting odd shaped holes. You will want accurate measurements, and there is no better way than a tape emasure
- A regular pencil, for marking your measurements. Any standard pencil will do the job, making sure you don’t cut a hole too large for your hinge outline. A pencil outline is a life saver, keeping you on track for your door construction.
Of course, you would also likely need to get some hinges and a wood piece. There’s no use in trying to build a full door without a piece of wood, even if cutting it down results in surplus material. Your base material needs proper measurement, whether you’re using a chisel tool or power tools.
Flat head screws will also be useful to have, as most holes for hinge pins are designed for them. Nails can split the wood, so unless you have extra wood then you rin the risk of damaging your materials. Not to mention the damage you could do to the entire hinge.
As well as temporary screws, a sharp pocket knife or utility knife will come in handy. A pencil created line is a good start, but wood scoring will help your chiselling and drilling. With the size of a common hinge, you’re unlikely to do be spending a significant amount of time unless you’re fitting additional hinges, and a knife score will keep you in the desired dimensions.
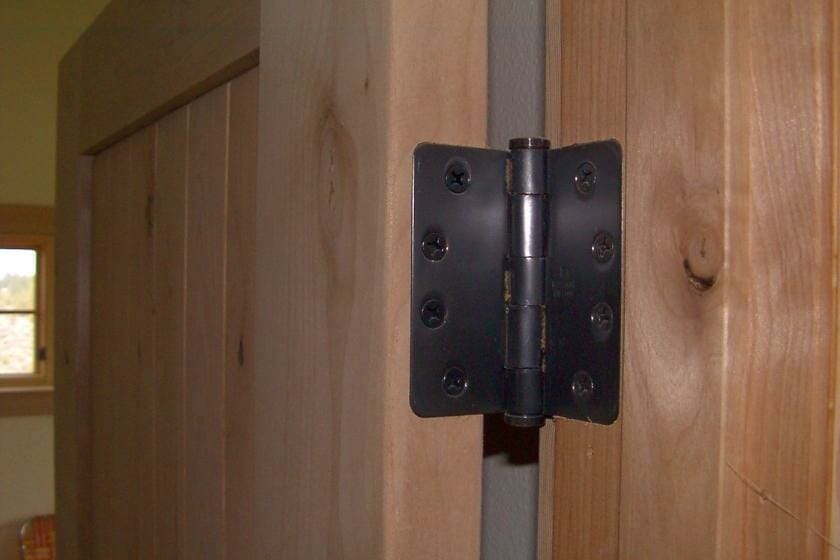
The Chisel Method
Using a chisel is the tried and true method of cutting door hinges. The top, bottom and middle hinge can all be easily chiseled out with the help of a hammer. So let’s find out exactly how to get our hole ready with a few simple steps, so we don’t have to use a hinge jig for doors, and start smoothing our rough edges:
- Step One) Score your wood. This can easily be done using a sharp utility knife, to make an indent into your wood. We must set the hinges exactly where you want on the door frame. Keep the hinge securely in position with your hands. The door should be arranged such that the rear border is readily visible. Bring a utility knife once you’ve determined where it is the hinge will need to go on the door. A pencil might be used, but the blade will provide more obvious boundaries to work with. Make doubly sure the lines are broad enough if you’re going to use a pencil. You may also consider drilling pilot holes depending on the hinge thickness.
- Step Two) Start to chisel. Fairly self expanatory now, get your chisel into the outline you just made and start to hammer it through. You should grip the chisel vertically. Ensure the bevelled side of the edge is facing the mortise. Pound on top of the chisel with a hammer, to clear out some of the hinge mortises. You can also measure the size of the hinge leaf. Continue to move the chisel. Also, tap on it at the same moment. As you would like to keep with the marked lines, make sure it cuts around the complete scored area. Make sure you’re not creating a mess line or trying to expand the mortise.
- Step Three) Parallel lines. Next you’ll want to start cutting parallel lines, as parallel line cuts will help you clear any excess material and waste from your base material. Set the chisel vertically from one edge of the outline. Essentially, this is the junk area. Now, using the same breadth as before, tap hammer on the chisel to produce an incision. Use the chisel as often as needed to cut along the mortise’s whole width. Continue with a similar procedure. Also, cut parallel lines the same distance as your hinge thickness across. Using this route, go to the opposite mortise end.
- Step Four) Waste clearance. Now it’s time to clean your base material fully. Squeeze the chisel securely at a low angle with the door at this stage. This must run parallel to the door’s span. Make very sure the flat side of the chisel is against the timber. Then you may softly tap the chisel with the hammer. Do it to remove any waste from between the line cuts you created in the previous step inside mortise. Cutting depth should not exceed the hinge diameter or hinge depth. If you don’t choose to use a hammer, you may instead use your hand’s pressure. Some folks found that utilising their hands gave them more control over the procedure.
- Step Five) Mortise cleaning. Although hinge manufacturers are good at making metal bar hinges somewhat flexible, allowing them to be installed easier to to break less often, a clean mortise is still required. Place the bevelled side of the chisel flat on the wood at this point. Then push it with the force of your hand, so that any remaining waste may be removed from the area. It’ll also aid in flattening the mortise bottom. You would not want to scratch the finish. Also, avoid cutting through the mortise’s thin and shallow walls. Simply insert the hinge into the mortise you’ve constructed. Make sure it blends in nicely with the wood available in the area. Also, if there are any elevated spots, get rid of them. You’re already familiar with the chisel method of removal.
You should also keep in mind that door hinges usually come up roughly eleven inches from the bottom. Other measurements aren’t uniform, as top hinges should come about seven inches below, while your middle hinges should be centred on the base material.
The Drill Method
If you’re fortunate enough to have an electric power drill at home, then you can save on a lot of physical effort. You can cut a strike plate, door hinges, and more with greater ease than the previous method. All you need is a flat surface and a bit of time:
- Step One) Measuring. To take measures, you’ll need to use a tape measure and a pencil to create an outline. Position the door atop of the sawhorses. Then you may use a pencil to mark the dimensions on it. Ascertain that the hinge outline is facing the ceiling. The depth of the hinge should match the depth of the drill. Avoid going farther since it will bring difficulties later. As doors can be quite cumbersome, consider finding additional space.
- Step Two) Get cutting. After turning on the drill, begin cutting following the outline. Don’t rush the procedure; instead, do it slowly and steadily. You should begin drilling in the centre and work your way out to the borders. It should take as little as a minute to finish the mortise cut. Clean whatever rough edges you may have with a chisel if necessary. You may also use the drill to smooth down rough edges. Having considerable control with a chisel, on the other hand, makes this removal method easier. Furthermore, the output is more precise.
The Dremel Multi Tool
Try moving the tool lower after turning it on. So the bit may fully enter the hinge. After then, you may stop pressing the Dremel. Check to see if you’re keeping the pencil outline as accurately as possible. The best way to improve accuracy is to keep things steady and gradual.

After that, you must remove all excess wood from the framework. Remove all of the debris, as well. The operation is complete after the hinge is flat within the hole. Continue for all of the additional hinges that need to be installed.
Safety Precautions
Using sharp blades and heavy power tools require protective gloves. These safety gloves not only help avoid unwanted accidents and cuts, but can also provide extra grip. With a sturdy enough material, they’ll prevent even the steadiest of hands slipping from moisture and sweat, a very real challenge otherwise.
Quality safety goggles should also be used, and is the most common of protective measurements in wood working. Excess material and shavings of wood would damage your eyes on contact, so keeping a barrier of safety goggles is beneficial to your long term eye health.
If the door is heavy, or rather too heavy for you to lift alone, make sure you ask for help. This can prevent wear on your joints, most commonly your knees and back. Drawing a pencil trace, drilling, and even chiselling can be easier than lifting a heavy piece of wood alone. So don’t be afraid to find a friend who can help you out in a pinch.

