Shoes can build up more than you realise, whether that’s the latest trend from so called Sneaker Heads, or just a loved collecting up various elegant designs for various functions. Either way, especially in larger households, you may be struggling to store the footwear. That’s why you need a shoe rack.
How to make a shoe rack from wood pallets? A decorative pallet wood shoe organizer can hold several pairs of shoes. The simplest design is to cut a pallet up, and use any spare or additional wood to create a fixed bottom that will hold the shoes in place, and collect any dirt or unwanted debris as well.
We will take a proper look at the different construction methods, whether you’re an amateur looking for a simple fix, or an expert woodworker looking for a more advanced project to pass the time. Storage space can be hard to come by nowadays, so it’s important we find ways to appropriately manage and arrange it.
So if you’re having issue with clutter from shoes lying around in your hallways, or a few pairs of shoes strung about the place through your home, then keep reading below. Maybe a pair of shoe racks will help you clean up, and even decorate depending on the design!
Why Make a Shoe Rack?
Anyone with a collection of shoes understands the need for a shoe rack. By design, most footwear is inflexible to store, designed for prolonged use and wear outside. Still, it’s only human to try and keep our clothing (including our pairs of shoes) clean and tidy.
Sneaker collection has become a popular trend among younger people, but collections of cluttered shoes have always been in fashion to some degree. That’s why furniture for shoes was first created, whether you’re buying little sized shoes for a toddler or buying the highest end boots from an expensive shoe boutique.
Suggested Equipment and Safety
Shoe collector or not, DIY projects involving sharp or otherwise dangerous tools can be worse for you than some unorganized shoes. Even a simple shoe rack will require you to use a saw or a power tool to cut some wood, and a drill or hammer for screws or nails. To make some space for shoes, you’ll need:
- A pallet, although any other wood planks or boards may suffice with additional screws
- A hammer, or a crowbar to help pull apart loose bits of wood from your pallet
- A saw, a hand saw is preferable but an electric jigsaw may be fine depending on the cutting depth, and if you have appropriate clamping equipment for the wood
- Paint, if you intend on making your wooden pallet shoe rack fit with the decor of your home
- Paint brush, in order to apply the paint color of your choice
- Sanding equipment, you can use an electric sander or simply sanding paper by hand if you don’t mind a little bit of an arm workout
- Screws, for fitting extra boards from the pallet cutting to form a proper container
- A drill or a screw gun, to actually fit those extra boards as doing it by hand can be a daunting task
- A level measure, to make sure your wall shelves won’t be too wonky when you finally fit them to your entry way wall or elsewhere
- A stud finder, for when the time comes to hang your wood pallet shoe racks onto your dry wall
Optionally, you may also be interested in a varnish, such as polyurethane, to help keep your fresh coats of paint from chipping or wearing easily. There’s nothing worse than splashing out on your enamel paint of choice, only to have it be gone within a month of you painting your new shoe storage shelf.
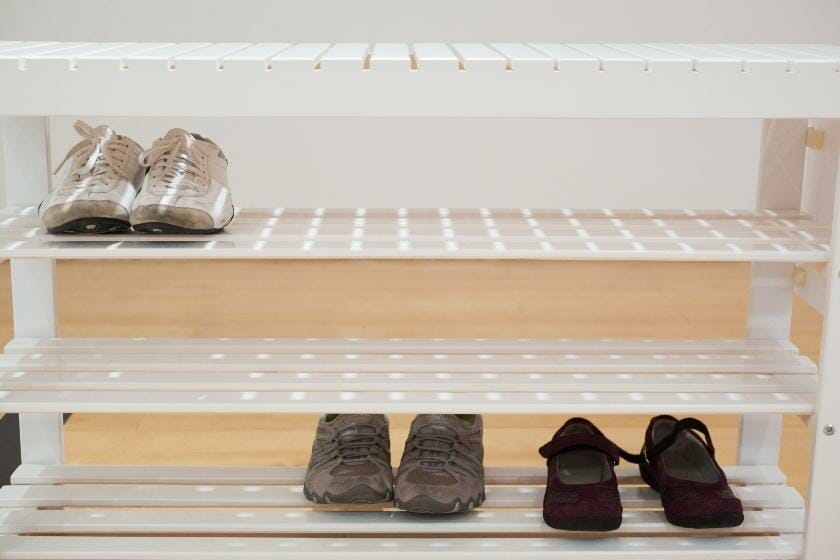
The Basic Shoe Rack
There are many designs for a shipping pallet shoe rack, but the following one will be your most simple. No extravagant designs, fancy shapes, multi purpose refittings. Just an ideal pallet shoe organizer, coloured with your paint of choice, fitted to your bathroom wall or kitchen wall for your pairs of shoes:
- Step One) Cut your pallet. For a simple DIY pallet shoe rack, you’ll likely be using a commonly sized palletet. You’ll want to cut and divide this into three equally or similarly sized sections. For a larger shoe rack, you may be able to find larger pallets, or you may extend the rack later. You should also flip the pallet so that the planks that would be on the top for shipping are on the back, as this will be the section of wood used to attach to your custom wall of choosing.
- Step Two) Using excess boards. Cutting the pallet may produce additional planks of lumber for you to use, and if not then you should find some extra boards. These will be fitted at the bottom of your pallet, turning it from a cut piece of wood into something resebling a wall shelf. If you are using wood from elsewhere, be aware you may need to resize it accordingly to the pallet’s dimensions.
- Step Three) Fit it all together. Screwing the bottom onto the board is pretty self explanatory. In the end it may resemble a planting box fit for soil, but so long as the bottom is fixed then it doesn’t matter about any gaps between boards. These bar style openings create an appealing aesthetic, and are a core part of most wood shoe rack ideas.
- Step Four) Sanding. Wood pallets aren’t designed to look pretty. They’re made to handle heavy bulk loads for shipping, and to transport these same loads. As such, your pallet will be rough and coarse over the majority of its visible surfaces. Sanding these to be smooth won’t only help make any shapes of pallet boards you’re using look better, but will make the next step far easier as well.
- Step Five) Get painting. A coat of colorful paint can elevate your shoe storage space to the next level. A properly sanded plank of wood should be easy to cover, and you’ll be able to stretch your bucket of paint further as a result. No excess paint getting caught in unwanted nooks, just a smooth surface to make beautiful.
- Step Six) Get hanging. Using a stud finder to locate the studs, you can start to put your new shelving up on the wall. Make sure to use your level measure when doing so, otherwise your shoe racks may become an uneven surface, and your footwear will fall out! Not to mention you may end up causing unwanted wall damage if you are forced to undo the attachments you have already made. Measure even spacing between multiple racks as well, for a clean and organised look on any wall.

That’s all she wrote! A simple, yet elegant and effective design for your pairs of shoes. This design would also be just as good for an outdoor bar wall, keeping glasses or other utensils as neatly as they keep jogging shoes or boots.
Other Shoe Rack Idea
So maybe you’re a little bit of an expert, or perhaps you’re more adventurous and a simple pallet rack won’t satisfy your ideal shoe storage solution ideas. Luckily for you, there’s a wide range of pallet plans available, and different designs which we will now discuss:
- A corner pallet wood shoe rack. Designed for, you guessed it, slotting into a corner neatly. This design best used in a living room environment, where the various cabinets of a kitchen or bathroom won’t get in the way, and neither will the front door. However, it could still come in handy by your doorstep. It can store several pairs of shoes, and looks good with a lick of paint or even the more simple rustic style plain wood if you’re feeling a little lazy when it comes to design.
- The multi purpose pallet shoe rack. This hallway hanger and shoe rack is ideal if you really want all of your organisers in one place. It’s practical because you’ll only have to remove shoes, jackets, or hats from one location or corner. The scrap wood for this furniture can be decorated to give it a rugged appearance. To make it more accessible, this might be positioned in your hallway or right beside your front entrance. Keeping all your outdoor essentials in one place is convenient, and you’ll be less likely to forget something on your way out of the front door. All thanks to this multi purpose shoe organizer.
- A hanging wood pallet shoe rack. A large cabinet filled with shoes beside the entrance or in some other corner of your house can also be a little bulky and cumbersome. Let’s see if we can hang them. Another alternative solution for storing clutter and disorderly shoes around the house is it this pallet wood shoe rack. You can suspend it at eye height instead of laying it on the ground. You won’t have to hunch down and look for your high heels, making shoe shopping easier and faster. Your pairs of shoes will never look so neat as this.
- Mini pallet shoe racks. If you don’t have a truck of shoes, then perhaps you’ll need something a little smaller for storage. Presenting the DIY mini pallet shoe organises, perfect for three pairs of shoes. Mini pallet boards are petitie in size, and aren’t so cumbersome as full shipping pallets. This means they’ll take up less space on your wall, truly a storage dream come true. Their size also makes them perfect to have multiples, perhaps one for each bedroom in a large family house, or even one by the front door and one by the back door for gardening shoes and wellington boots.
- A pallet wood shoe rack chair. Speaking of outdoor footwear, this chair is perfect for your back garden. Another option to reduce shoe clutter is to sit in a chair with a shoe rack underneath it. A combination of convenient storage and practicaly seating, you can keep your gardening boots tucked underneath a sturdy piece of furniture. Throw on a coat of paint, a few cushions, and bring out a table then this chair would be perfect for sitting two or three people at a time. As well as storing their shoes right under them.
- Table shoe rack pallet design. Looking for a table to apir with that chair? Then look no further! A relatively simple table design can easily be used for shoe storage, both outdoors or inside your living room as a coffee table. At the same time, it serves as a shoe organiser and a table. That is, if you have enough of additional pallet timbers of a suitable size to construct it. The capacity is moderate; if you just have a few pairs of shoes, this shoe rack will enough; however, if you have a lot of shoes, you’ll need a larger shoe rack. It would be quite simple to build this in a day if you had all of the necessary materials and tools.
More Complex Designs
Looking for a project you can really sink your teeth into? Then consider the hexagon pallet wood shoe rack. With an intricate shape, you’ll certainly be spending more free time labouring over this design than any of the others aforementioned above.
This shoe organiser is great for your children’s little shoes. Because of the hexagonal form of the interior, it can only hold little shoes. You could create this using pallet woods as well, but it would take more time to put together; yet, it would be a lovely piece of furniture to place in a corner of the home.
The shape is stylish and elegant, perfect for slotting in beneath a wardrobe if you have excess space, or maybe even at the bottom of a pantry. Although greats for the kids’ shoes, a little bit of extra effort and you can make a hexagon large enough for adult sized shoes. This will take more wood, planning, measuring, and cutting than any other shoe rack in this list.

